Before your sensors arrive
You can start before your sensors arrive. Login to the Control Room and set up any sites where you will be installing. They'll be ready to connect sensors to when they arrive.
You can also create new users in the Control Room if you want someone else in your business to do this setup.
Control Room
You'll be asked to set a password to create your account.
Sites
Create a site for every business location you want to use Hoxton sensors at.
Monitors
Within each of your sites, create People Count and/or Occupancy Monitors to start understanding your visitors.
Positions
Positions are where you will mount a sensor within a monitor. If you set up an Occupancy Monitor in a room with 3 doors, you should create 3 positions and connect a sensor to each.
Once you've received your sensor
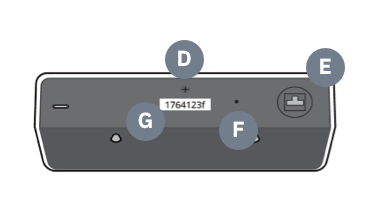
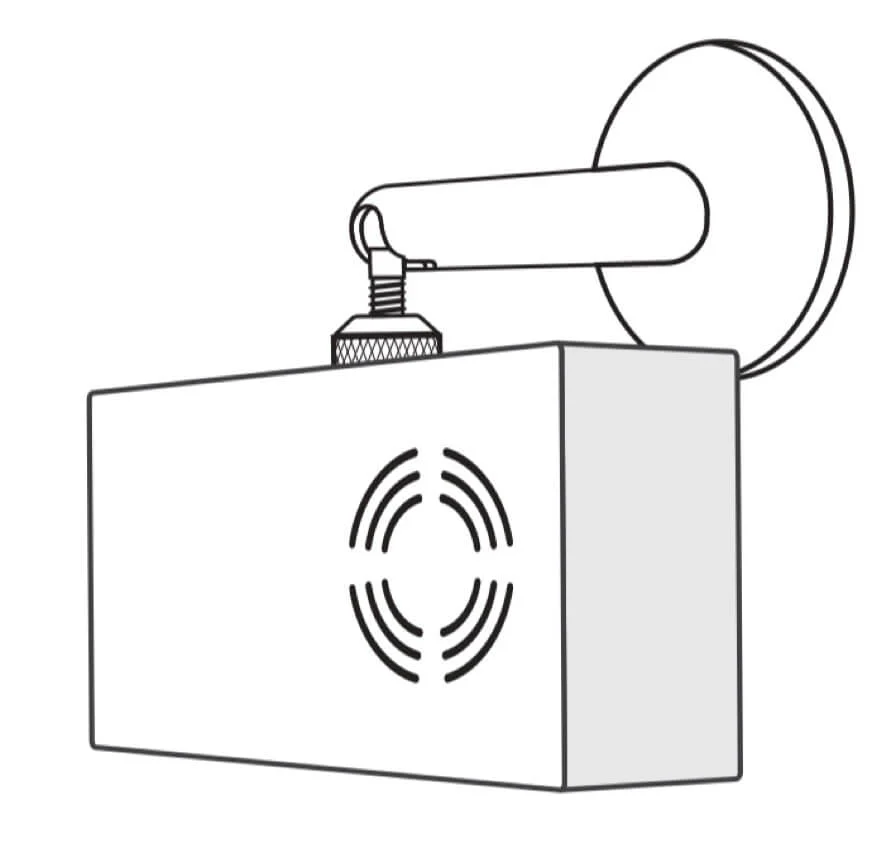
What's in the box
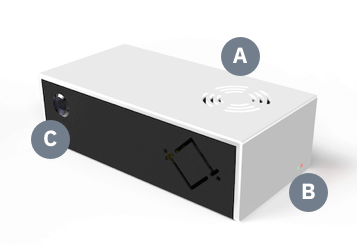
A. Air Vents B. LEDs C. Camera Lens
D. ¼ inch screw fixing E. Power port F. Reset button G. Serial number
H. Power plug I. Power cable J. Camera wall mount
Register your Camera
Do this before you've powered the Camera. It lets our platform know your device is coming.
- If you haven't already, create your Control Room login and set up your site(s).
- Login to the Control Room cameras page.
- Press the Setup Camera button.
- Enter the serial number of your Camera, which can be found on a silver sticker on each device, and follow the remaining steps on screen.
- Your Camera is now registered and ready to be powered.
Later on you will need to set up a Monitor for your sensor to start counting traffic. You can find out more about this in the Control Room user guide. But for now, you just need to register your sensor and test the camera view as described here.
Power your Camera
When powered the red LED will be visible on the sensor. See all device statuses.
The sensor will now be in Hotspot mode and ready to be connected to the internet.
Connect to the internet
You can connect through Wi-Fi or Ethernet.
Connect by Wi-Fi
When the sensor is in Hotspot mode, use a computer, smartphone or tablet to connect to the Wi-Fi access point named "Hoxton Direct hotspot". After a few moments a pop-up should appear. Select the network you wish the sensor to connect to and enter the password.
Connect by Ethernet
Simply plug an Ethernet cable into the sensor's port. For Power over Ethernet (PoE) setups this will also provide power to the device.
View a test frame
If you have registered your sensor and connected by Wi-Fi or Ethernet as described above, you can view a test frame from your sensor camera.
You should do this before mounting the sensor for easier troubleshooting if there are any issues with the camera.
- Go to the Control Room cameras page.
- Select the camera you want to test from the list.
- You should see a test frame from the camera.
- If your camera view looks correct, your camera is ready to be mounted.
- If the test frame does not look correct — see our troubleshooting guide.
Failure to pull an image at this stage is normally related to poor Wi-Fi connectivity.
A sensor needs to maintain its internet connection to keep counting your visitor traffic. It's recommended you set up an alert to notify team members whenever a sensor is offline. See how to do this in the Control Room user guide.
Mounting your sensor
Please read the requirements below before mounting your sensor. Failure to do so might affect the accuracy of your data.
Sensor position
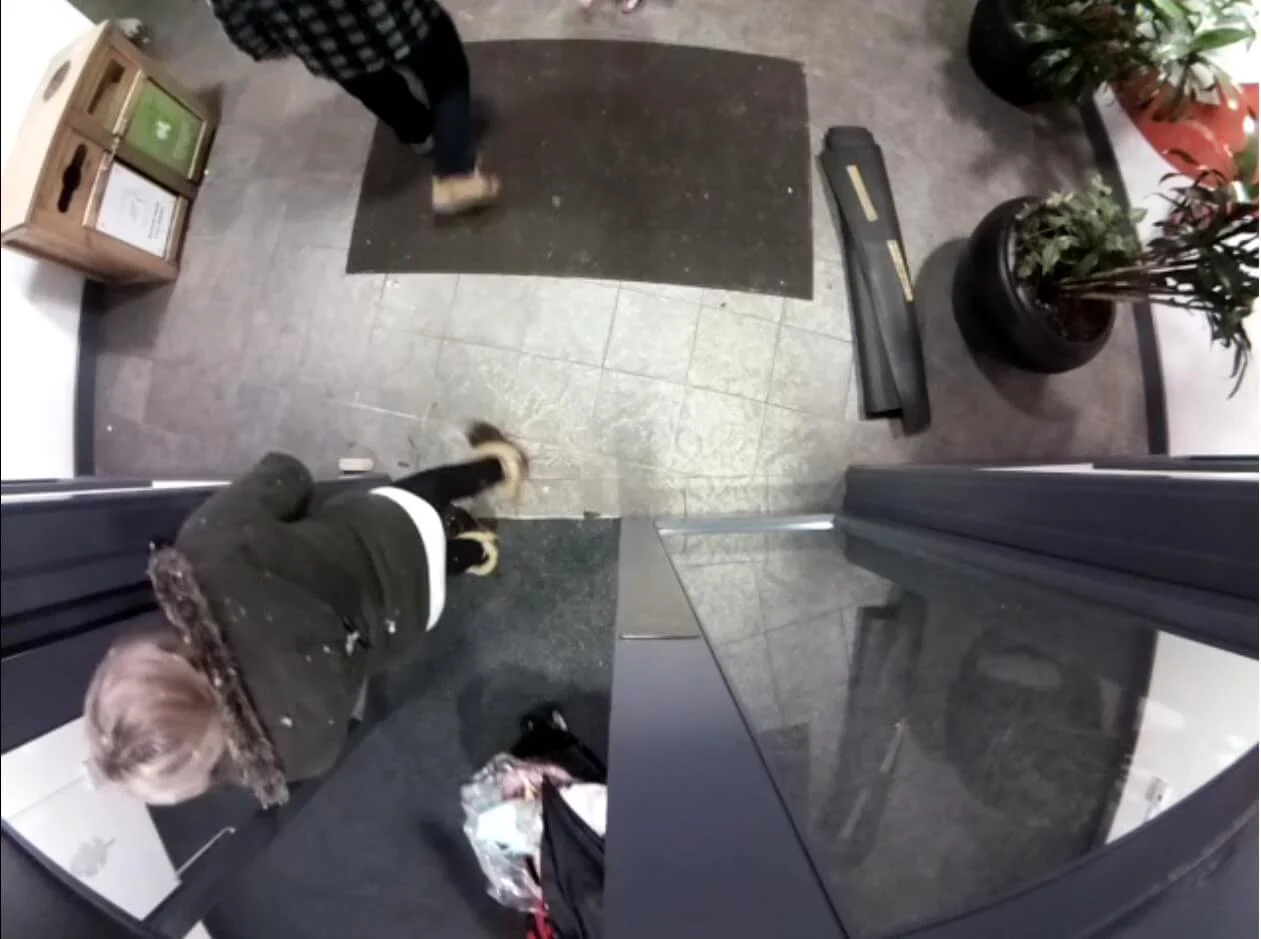
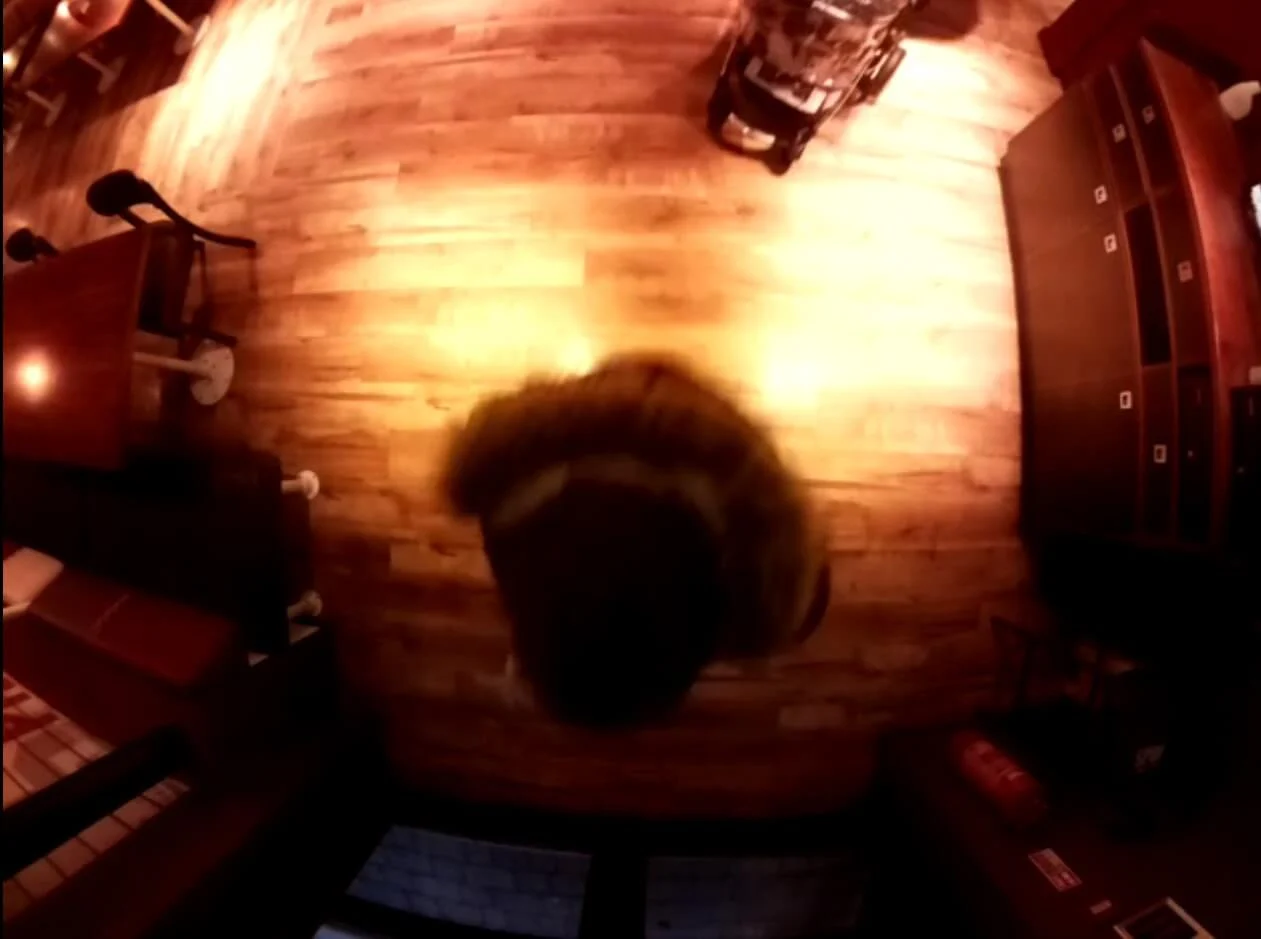
Ensure there is good lighting. You must be able to see a clear distinction between head and background. Doorways should also be clear of any obstacles that inhibit traffic flow. They should also be clear of people loitering or queuing.
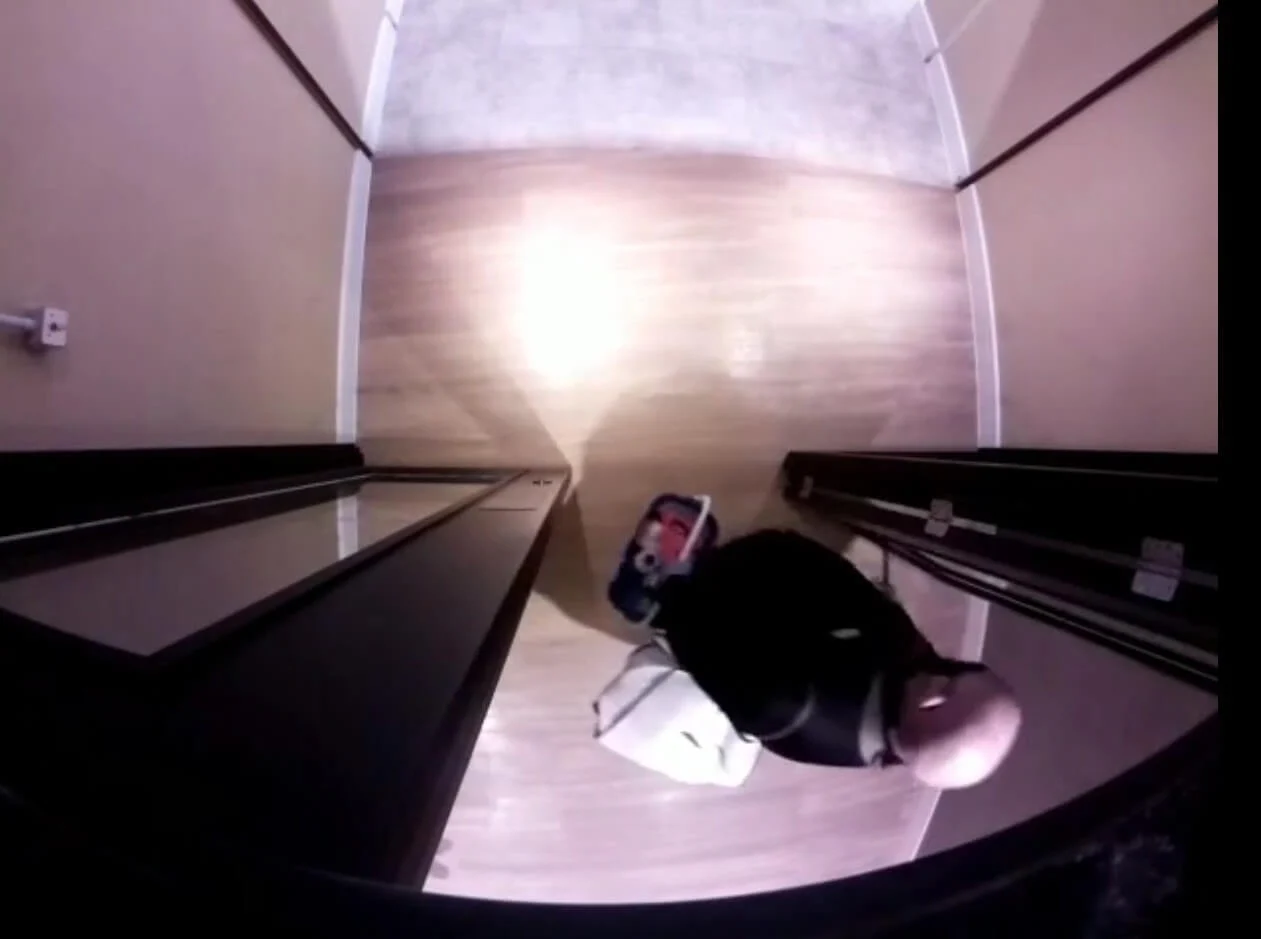
The person's head is clearly visible.
The person's head is clearly visible.
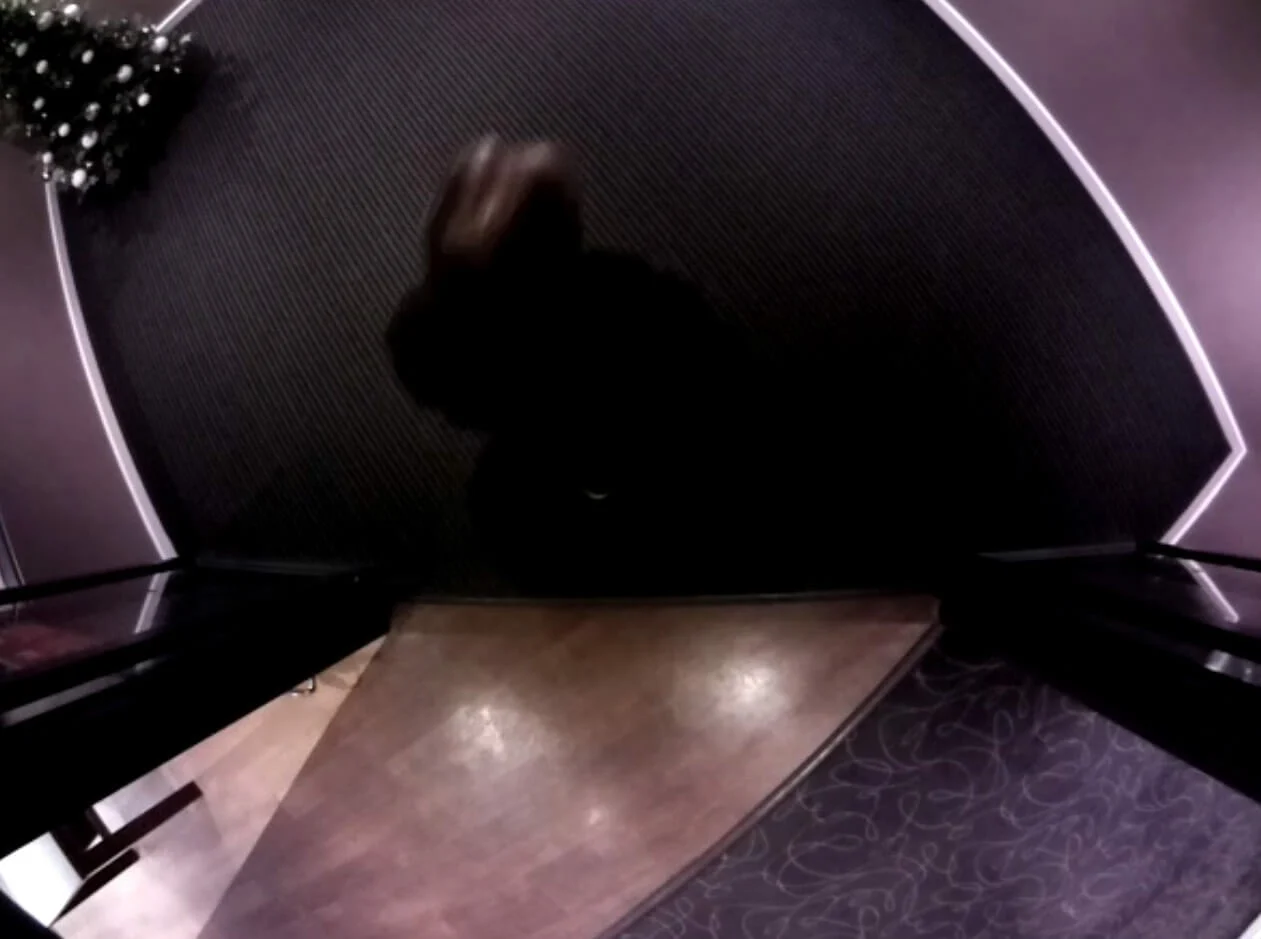
The person's head cannot be seen clearly.
The person's head cannot be seen clearly.
Minimum mounting height
The sensor must be mounted at a minimum height in relation to the width of the entrance being covered.
| Entrance width | Minimum mounting height (camera lens to floor) |
|---|---|
| 107 cm (3′6″) | 240 cm (7′10″) |
| 157 cm (5′2″) | 255 cm (8′7″) |
| 207 cm (6′9″) | 270 cm (8′10″) |
| 257 cm (8′9″) | 285 cm (9′4″) |
| 300 cm (9′10″) | 300 cm (9′10″) |
Centre the sensor lens
For accurate counting the lens of the sensor must be over the middle of the flow of traffic.
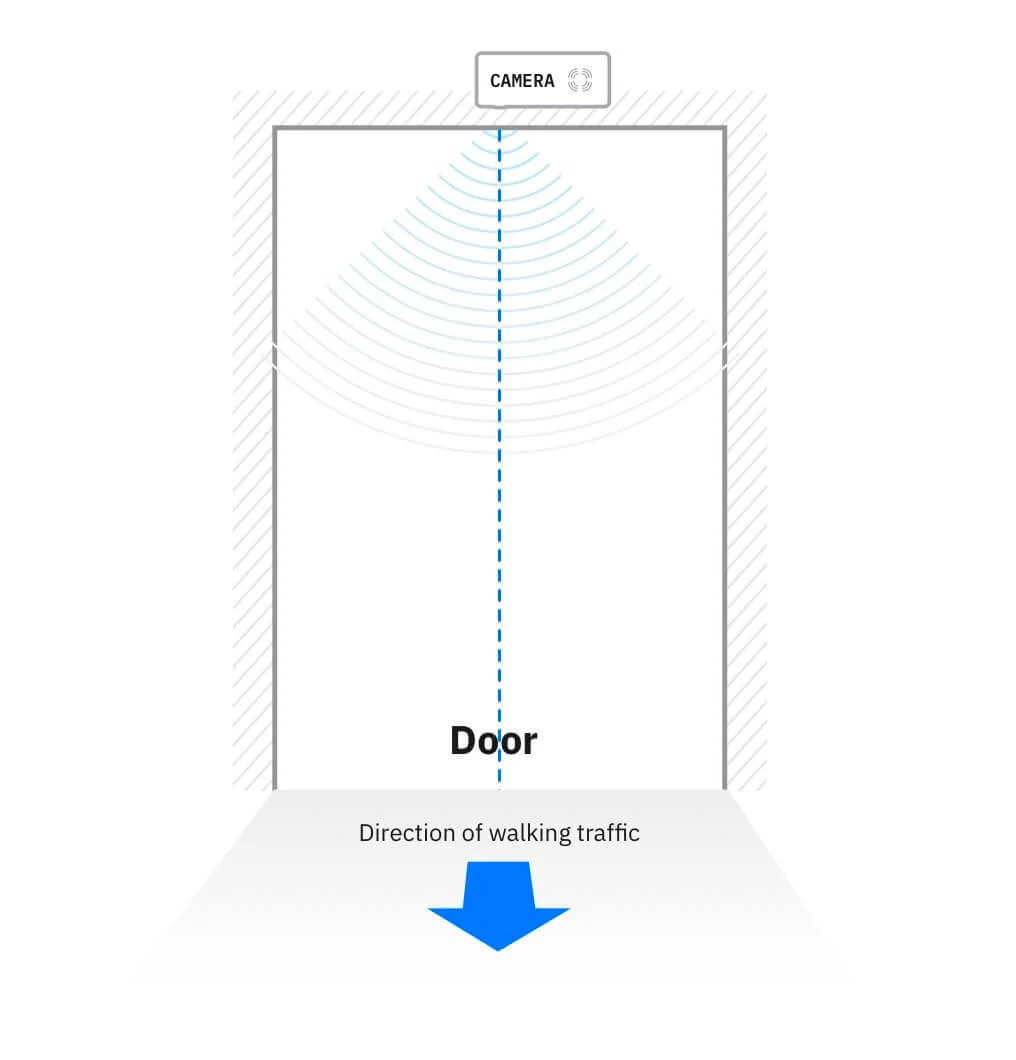
The sensor lens is in the centre of the doorway.
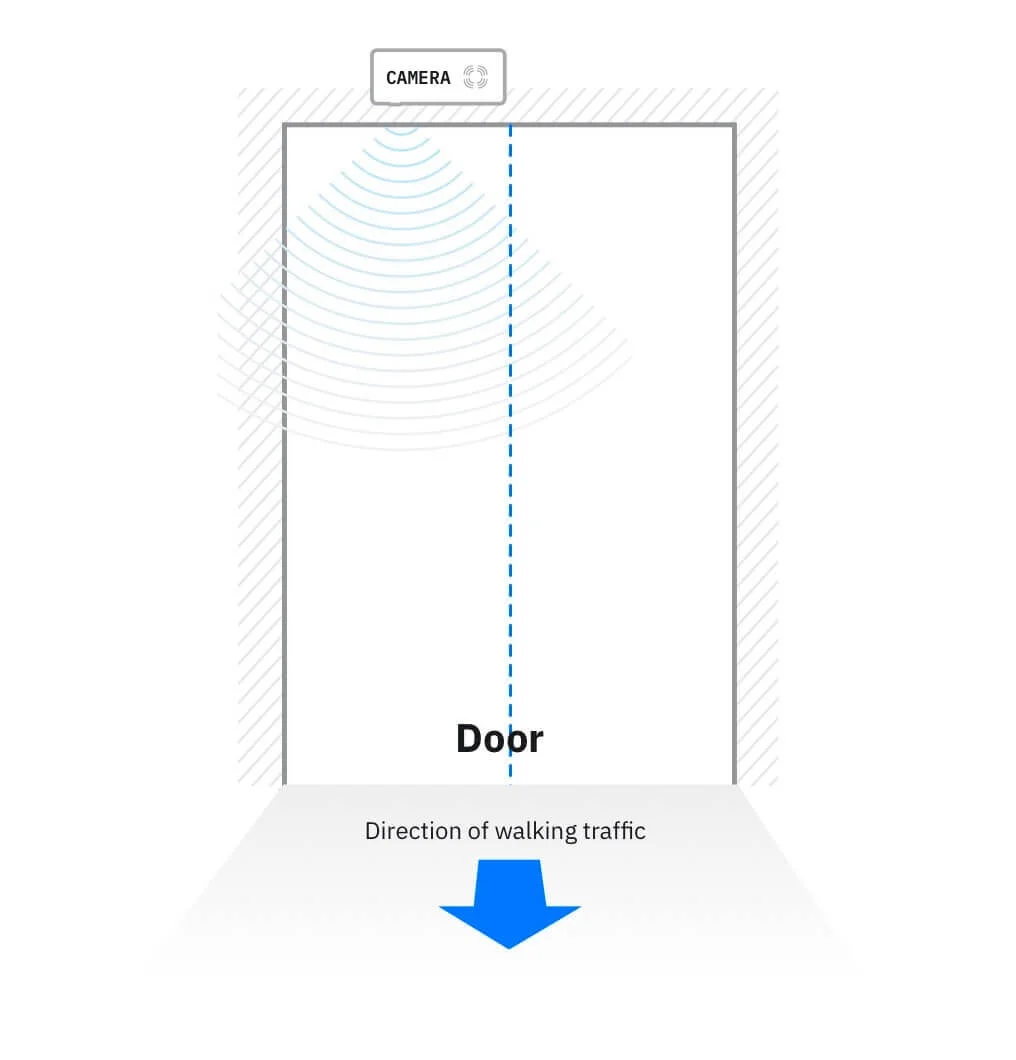
The sensor lens is not in the centre of the main traffic flow.
Mount close to the doorway
The gap between the doorway and the sensor should be minimal. In particular it must not be possible for anyone to walk out the door without passing under the sensor.
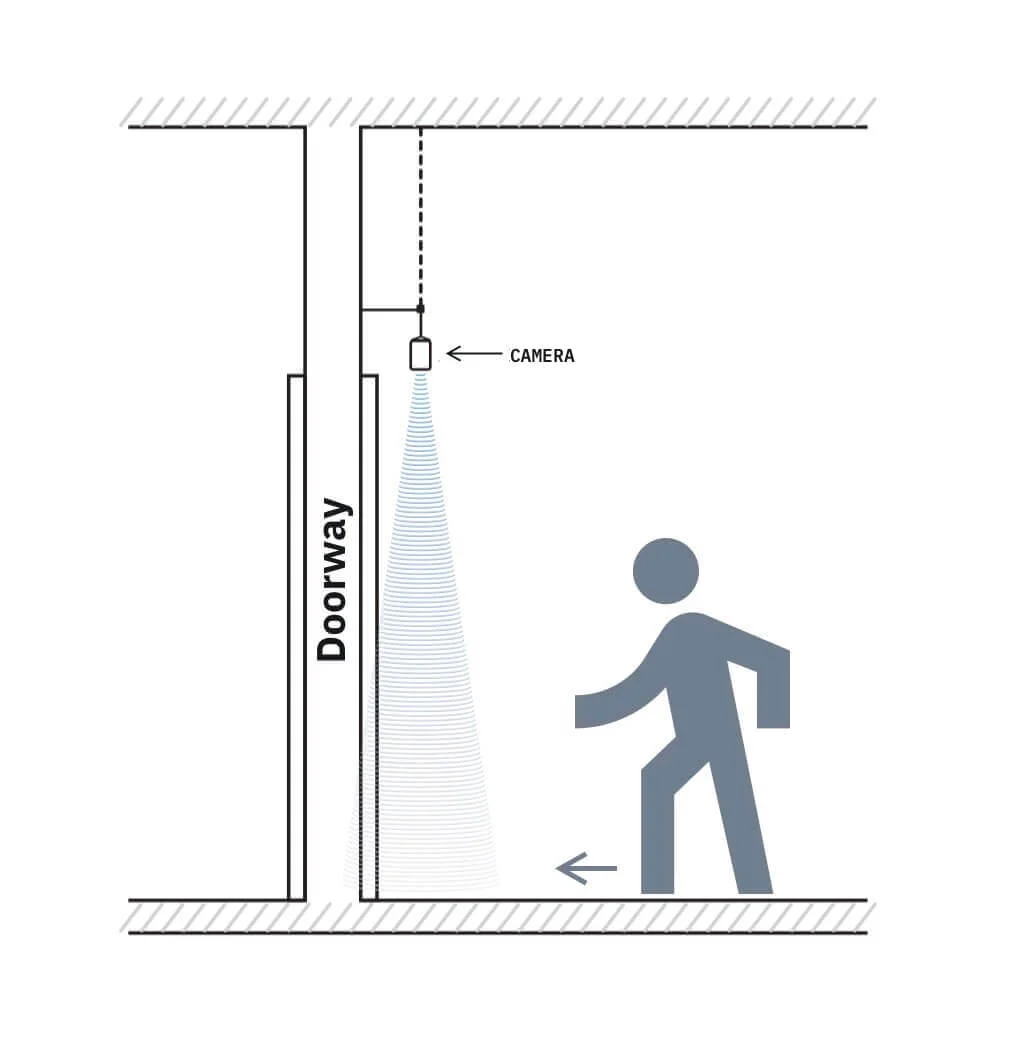
The sensor is mounted close to the doorway.
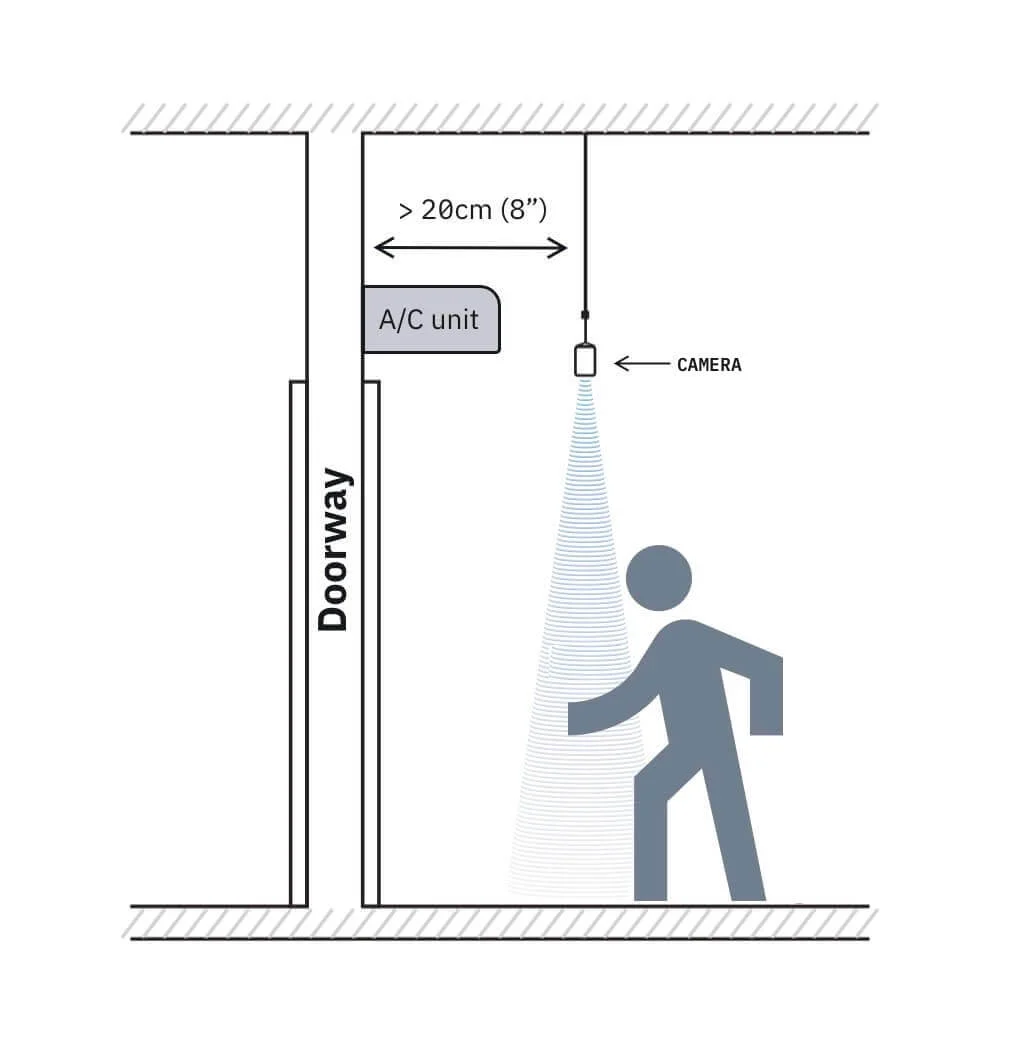
The sensor is mounted too far away from the doorway.
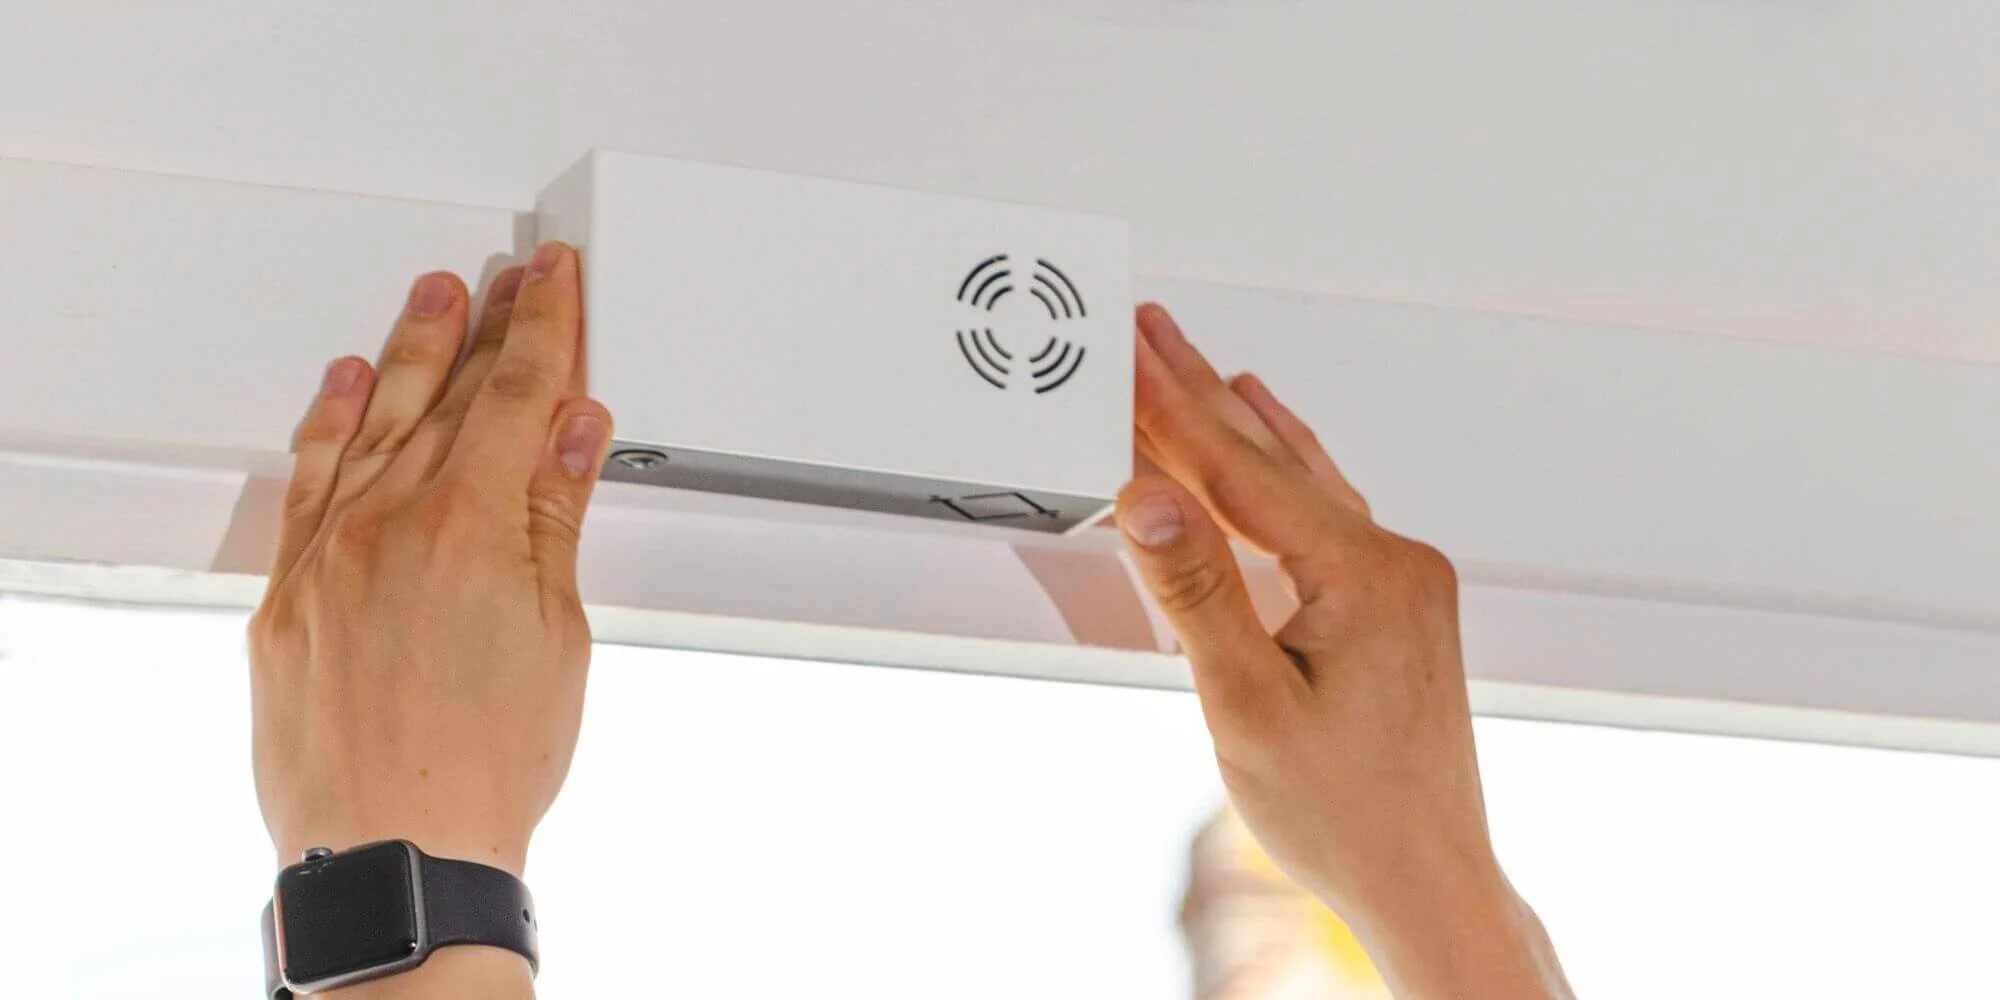
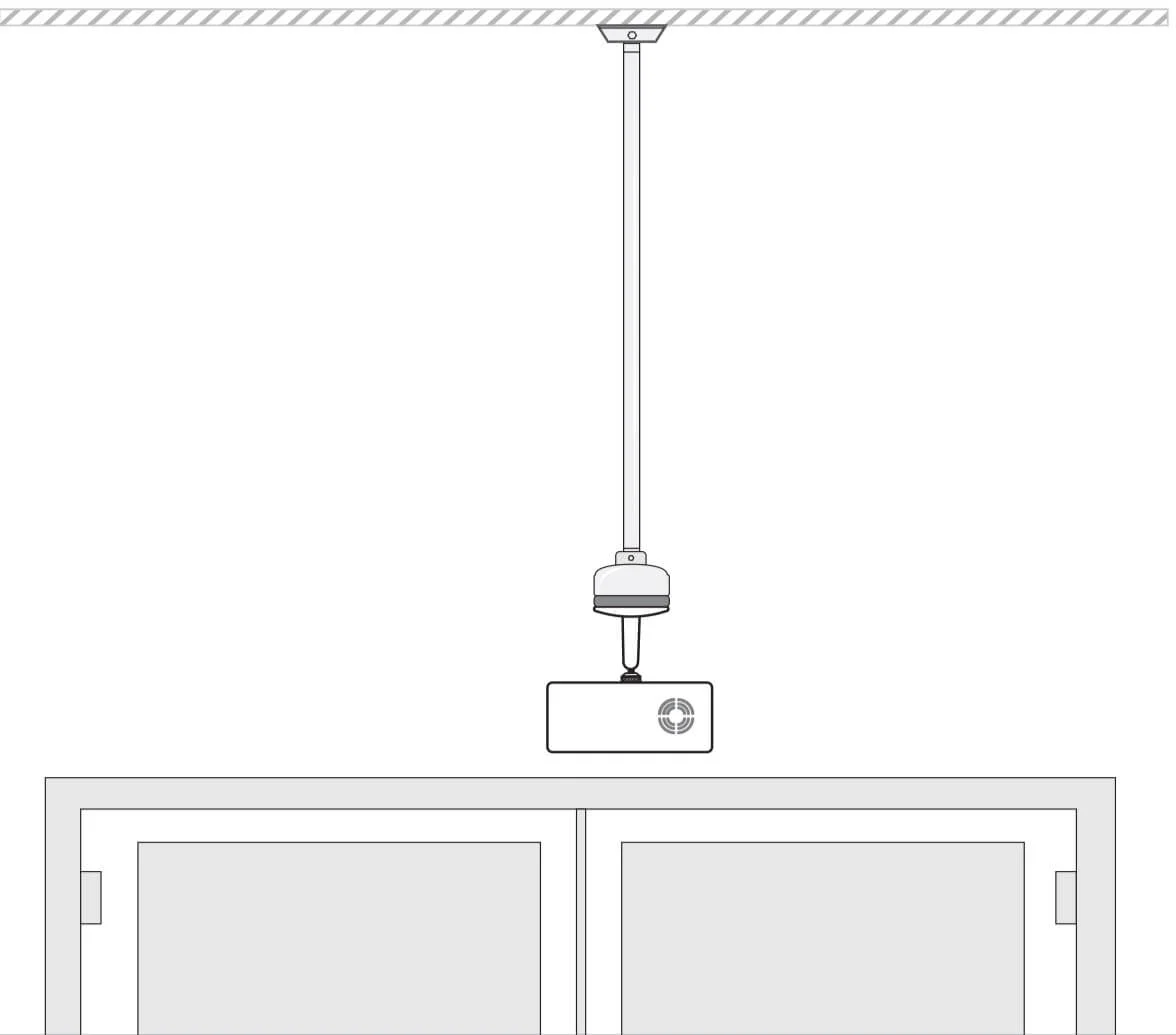
Fixing the sensor to the ceiling or surface
The device should be mounted using the wall bracket provided. Use the Camera Wall Mount (provided with the sensor) to either mount directly to the wall or to connect to a drop-down pole from above.
Once your sensor is mounted, you should check the camera view in the Control Room and confirm directions.
Next steps
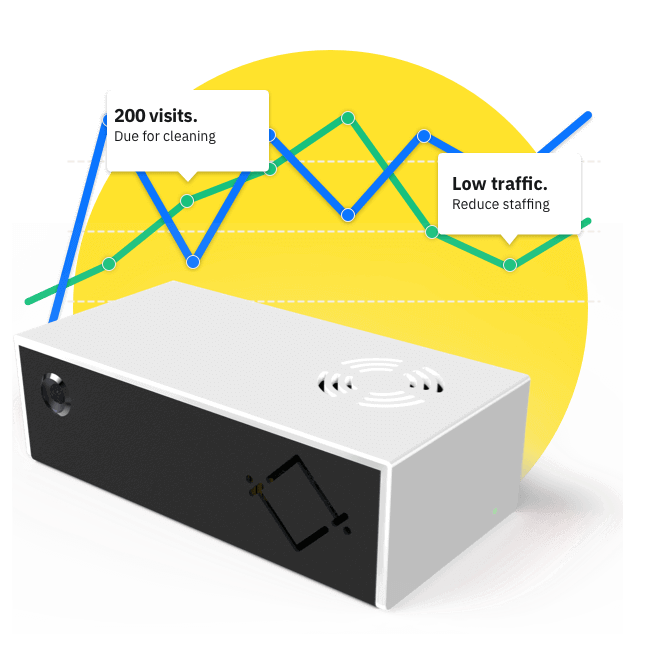
Now your sensors are registered and mounted — you are ready to set up some monitors and start finding out how people are using your spaces.
Our Control Room user guide will get you started with everything you need to know to do this.